Invite Team Members
Collaborating on ECTickets is built around Organizer Teams. As a team admin, you can invite colleagues, staff, or co-organizers to help manage events, purchase tokens, and run day-of operations — all from a shared Team Management Dashboard.
This guide walks through sending an invitation from Team settings, explains the available roles, and covers what your invitee should expect. If you were invited to join an existing team, follow the steps in Accepting a Team Invitation below.
Need help? Our Support team is available.
Before You Start
Make sure the following are in place:
- You have an Admin role on the organizer team (only admins can invite or remove members).
- Your team is set up — see Account Setup if you’re new.
- You know the invitee’s email address. They must use this same address when signing up or logging in.
Event tokens and subscription quota are shared at the team level. Invited members can help create events and manage sales, but billing actions depend on their role. See Pricing for plan details.
Navigate to Team Settings
After logging in to the Organizer Dashboard , open the Team settings page from the side menu. This is the same area where you manage subscription quota and purchase event tokens — see Dashboard Navigation for an overview of the Team Management Dashboard.
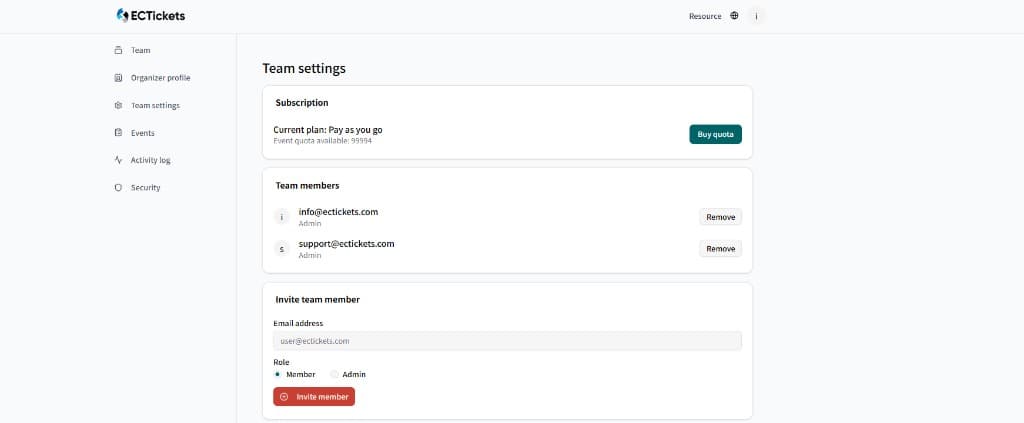
Screenshot: Team settings with subscription, current members, and the invite form.
The page has three sections:
- Subscription — current plan and available event quota.
- Team members — everyone currently on the team, with their role and a Remove action.
- Invite team member — the form used to send a new invitation.
Send an Invitation
Open the invite form
In Team settings, scroll to the Invite team member section at the bottom of the page.
Enter the email address
Type the invitee’s email in the Email address field (e.g., user@ectickets.com). Use the address they will sign up or log in with — mismatched emails will prevent the invitation from linking correctly.
Choose a role
Select one of two roles:
- Member — Can manage assigned events, view sales, and assist with day-of operations. Cannot invite other members or remove admins.
- Admin — Full team access, including inviting and removing members, purchasing tokens, and managing subscription quota.
When in doubt, start with Member and promote to Admin later if needed.
Click Invite member
Click the red Invite member button. ECTickets sends an invitation email to the address you entered.
Invitations expire 7 days after the email is sent. If an invite lapses, remove any pending entry and send a fresh invitation from Team settings.
What the Invitee Receives
Once you send an invitation, the recipient gets an email notification from ECTickets (shown below in Traditional Chinese). The message includes the team name and an Accept Invitation button.
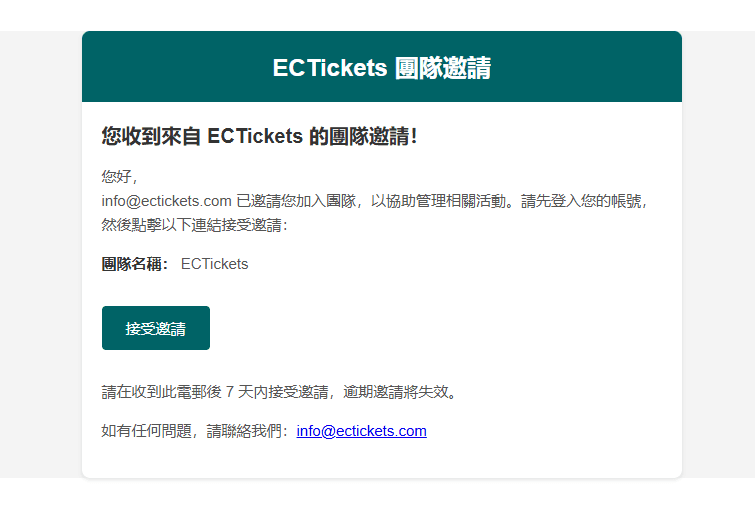
Screenshot: Team invitation email with team name and accept button.
The invitee should:
- Log in to their ECTickets account (or sign-up if they don’t have one yet).
- Click Accept Invitation in the email within 7 days.
- After accepting, they’ll land in the shared Team Management Dashboard with the role you assigned.
Accepting a Team Invitation
If an administrator from an existing Organizer Team invited you, use the link in your invitation email instead of the footer sign-up flow.
- Open the invitation email and click Accept Invitation.
- If you don’t have an organizer account yet, sign-up using the same email address the invite was sent to.
- After verification, you’re added to the inviting team’s dashboard with the role assigned by the admin.
If you already have an account, upgrade using the same email — your attendee history (e.g., past tickets) is preserved. Just enter your original password during setup.
Invitations expire 7 days after the email is sent. If yours has expired, ask the team admin to send a new invitation from Team settings.
Manage Existing Members
From the Team members list on the same page, you can:
- Review roles — confirm each person has the right level of access.
- Remove a member — click Remove next to their entry. Removed members lose access to the team dashboard immediately but keep their personal ECTickets account.
Keep at least one Admin on every team. If you’re transferring ownership, invite the new admin first and confirm they’ve accepted before removing yourself.
What Your Team Can Do Next
Once members join, everyone on the team shares access to the same event inventory and quota:
- Purchase or request event tokens — see Creating Your First Event.
- Create and configure events — see Event Management.
- Run check-in on event day — see Check-In Guide.
- Review sales and finalize payout — see Reports & Analytics and Payout.
Related Guides
| Topic | Guide |
|---|---|
| Setting up your account | Account Setup |
| Finding your way around the dashboard | Dashboard Navigation |
| Buying tokens and creating events | Creating Your First Event |
| Subscription plans and fees | Pricing |
| End-to-end organizer workflow | Getting Started Introduction |